
Installation of ring plastic outdoor floor
2022-08-03
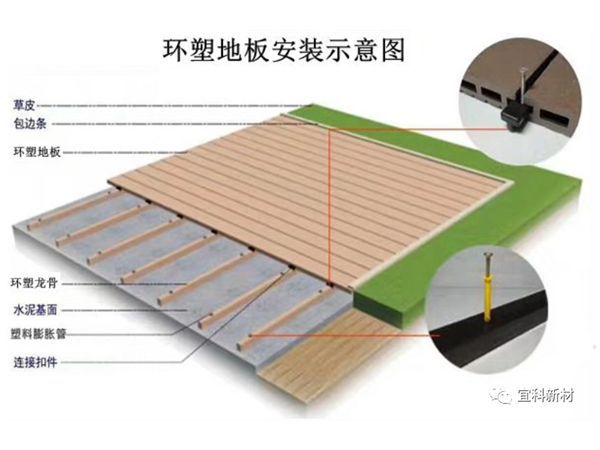
1. Ring-plastic flooring or ring-plastic materials can be cut, edged, shaped, cut saw, drilled, tenoned, etc. using ordinary woodworking machinery and tools.
2. Use a plastic expansion tube to fix the ring-plastic keel on the ground concrete foundation. The distance between the fixing points of the plastic expansion tube is 500mm-600mm, and the screw cap is lower than the surface of the ring-plastic keel (recommended cross-sunk head screws, the size is generally 4*30) , Ring-plastic keel fixation needs to do overall leveling.
3. Self-tapping screws can be used for fastening between ring-plastic and ring-plastic, and stainless steel self-tapping screws are recommended for outdoor use; drill-tail self-tapping screws should be used when ring-plastic and metal are connected.
4. When using self-tapping screws to fasten the connection between the ring plastic and the ring plastic, the hole should be drilled first, that is, the pre-drilled hole. The diameter of the pre-drilled hole should be slightly smaller than the screw diameter.
5. When installing the outdoor floor, no less than one screw should be used for the connection between the ring-plastic floor and each keel.
6. The junction points of the ring-plastic floor and the keel are all connected and fixed with plastic buckles or stainless steel buckles.
7. A gap of 3-5mm should be left between the ring-plastic floors for expansion and contraction.
pay attention:
1. The ring plastic keel is only suitable for the cement concrete floor that has been leveled, and the thickness of the cement is more than 8-10 cm (the size of the expansion pipe for installing the keel is generally 8*80mm).

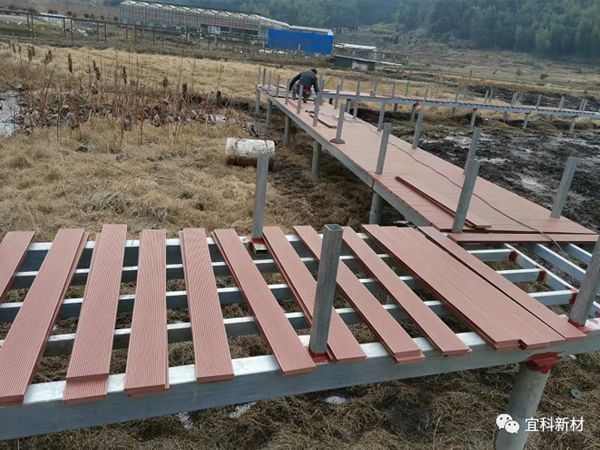
2. If the ground is uneven or suspended installation, use galvanized square pipe as the frame keel.
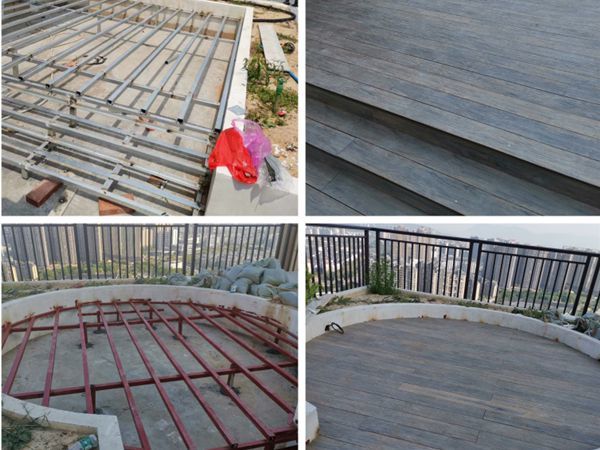
3. For balconies installed on the roof or above the first floor, considering that the floor slabs have been waterproofed, it is recommended to use galvanized square pipes as frame keels.

Address: Liuweigang Avenue, Hongqiao Industrial Park, Taixing City, Jiangsu Province

Follow Us
Copyright© 2022 Taixing Yeco New Material Technology Co., Ltd. Powered by www.300.cn This website already supports IPV6 Seo
